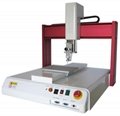
108B微電腦控制精密定時定量型點膠機
型號︰
108B
品牌︰
CRCBOND
原產地︰
中國
產品描述
應用: 可注滴的液體包括快干膠,紅膠,厭氧膠,黑膠,硅膠,SMT紅膠,黃膠,銀膠,矽膠,環氧樹脂,螺絲鎖緊膠,潤滑油,助焊劑 .適用的產品主要有:手機按鍵印花、開關、連接器、電腦、數碼產品、數碼相機、MP3 、MP4 、電子玩具、喇叭、蜂鳴器、電子元器件等產品的生產用途: 粘接、固定、點形塗布、線形塗布等
|
入電壓 |
108A半自動定時定量點膠機 AC110 ∽ 220V (可自動轉換為110V或220V) |
|
內電壓 |
24VDC |
|
消耗電力 |
9VA |
|
輸入氣壓 |
0.99MPa、無濕氣干風 |
|
氣壓調節範圍 |
20---650KPa |
|
放吐時間範圍 |
0.02--99.99sec |
|
動作模式 |
定時操作模式 |
|
連續操作模式 |
|
|
放吐開始信號 |
以腳踏開關等無電壓N.O.輸入 |
|
保持輸入信號(信號長>1ms) |
|
|
發出的間隔為30ms |
|
|
真空機能 |
內置有負壓產生裝置,防止材料滴漏 |
|
消音機能 |
外置有消音裝置 |
|
使用溫度 |
+50°C到-40°C |
|
外形尺寸 |
264*150*68mm(機身) |
|
重量 |
2.2kg |
|
標準配件 |
電源線 1PCS |
|
進氣管 1PCS |
|
|
腳踏開關 1PCS |
|
|
針筒架 1PCS |
詳細信息請來電咨詢13092650077
產品規格︰
Getting Started
We have organized this Guide to provide setup and testing procedures
for the CB108B原 200B andCB208B原500B dispensers.
If you have the CB108B原200B, CB208B原500B first review following pages which
illustrate how tohook up the dispenser and what the controls do.
First Steps
First Step:
Unpack and use the checklist enclosed with the Dispenser Kit
to identify all items. If there is any discrepancy, please call us
immediately.
Second Step:
Power and compressed plant air should be available where
the dispenser is to be set up. Air pressure should be between 80 and
100 psi (5.5 to 6.9 bar). (Bottled nitrogen be used will be better.) If you are
not using an air filter regulator ,be certain your plant air is properly filtered and dry.
Check voltage label to be certain it agrees with the available power.
Third Step:
Now is a good time to ACTIVATE your extended Three Year
No-fault Warranty. Please fill in and return the postage-paid
Warranty card, Or, if you prefer, call the appropriate toll-free number
listed below, provide the serial number of your dispenser and
respond to a few short questions.
CB108B原200B & CB208B原500B ---- Hookup
1 Connect the air input hose to a plant air source. Set plant air supply
within 80 to 100 psi (5.5 to 6.9 bar ). Where required, use an filter regulator
2 Attach the air input hose coupling to the dispenser . Pull back to confirm if attach tightly to dispenser.
3Plug in the foot switch connector to the dispenser
4 Install the power cord.
Check the voltage label on the input voltage outlet and place the power cord into the “power 220VAC”
ensure that both sides securely into position.
5 Attach the 55cc barrel pre-filled with colored , nontoxic test fluid
(included with the dispenser ) to the 55cc adapter head .
6 The 55cc adapter assembly .
insert the male tube into the air output fitting on the
front panel and try to pull back to confirm if be locked tightly. Place the barrel in the barrel
stand .
7 During the initial testing , you will not use the vacuum control .Keep
This control shut off (turned completely clockwise----do not force). And the back of the dispenser shouldn’t be heard any flowing noises
CB108B原200B & CB208B原500B for Testing
Power switch should be off.
The amount of material dispensed each cycle depends on the
combination of air pressure, time of air pulse, viscosity of material
and dispensing tip size.
The first step is to remove the tip cap from the pre-filled barrel of colored
test material (twist and pull). Replace it with an tapered dispensing tip.
Press the tip on and twist clockwise to lock.
Pull out air pressure regulator knob until it “clicks” into the unlocked
position. Turn clockwise to adjust the air pressure to 30 psi (2.1 bar )
for the initial tests.
Always set the pressure desired by turning the air regulator knob
clockwise. To reduce the pressure, turn the knob counterclockwise
until the air gauge reads a lower pressure than desired. Then
increase and stop at desired pressure. Push knob in to lock.
Set the timer control code to “06”.and test it. It is also allowed to test the Dispense
cycle time increases from0. 1 second minimum to 9.9 second as the timer
code you set.
Be sure vacuum control is shut off. In the initial tests, (the vacuum
pressure will indicate zero pressure. You may notice the
needle on this gauge (when turned off) will jump slightly after each
cycle. This is normal for CB308B原800 Dispenser).
Press power switch to turn on the dispenser . It will be a flashing red
light. That indicates the dispenser working properly
In this operation
mode, the timer will be by passed to fill the dispensing tip before you
begin testing . A continuous flow of material will occur as long as the
foot pedal pressed.
How the CB108B原200B & CB208B原500B Dispensers Work
With the air connected and the power on, here’s what happens when
you press the foot pedal.
(1) The digital timer is energized and begins dispense
cycle countdown. The LED lights during the dispense cycle.
(2) The timer opens a solenoid and closes the vacuum pressure for
the CB108B原200B & CB308B原500B, allowing preset air pressure to flow to the barrel reservoir.
(3) The air pressure pushes the liquid out the dispensing tip.
(4) At the end of the preset time , the timer shuts off, closing the
solenoid and exhausting the air in the barrel.
This completes the pulse cycle.
When the toggle switch point to “Manual” the timer is electrically by pass , and the solenoid is controlled directly by the foot switch
As long as the foot switch is pressed , the solenoid remains open,
providing a steady flow of liquid for filling till the delay time of the timer
code you set is over after you loose the foot switch


